[Tutorial] How to Fix OpenSSL Heartbleed on the RT-N16 (Tomato by shibby)
First, let me explain what OpenSSL Heartbleed is:
In OpenVPN’s own words on their site:
“A vulnerability in OpenSSL, nicknamed Heartbleed, was published in April 2014 1. OpenVPN uses OpenSSL as its crypto library by default and thus is affected too.”
Quoted from — OpenVPN’s official site
https://community.openvpn.net/openvpn/wiki/heartbleed#OpenSSLvulnerability-Heartbleed
In short, anyone using services that rely on OpenSSL runs into this vulnerability, and since OpenVPN also uses OpenSSL as its crypto library, it’s affected too.
As for the OpenVPN (Server) side, the affected versions run from 1.0.1 all the way to 1.0.1f;
on the Android Client side, it wasn’t unaffected until version 4.1.2;
the MAC OS X Client is unaffected;
on the Windows Client side, only the installers from 2.3-rc2-I001 to 2.3.2-I003 are affected.
To confirm, go to the C:\Program Files\OpenVPN\bin folder, find libeay32.dll, and inspect its contents—see the two images below.


Windows users who need to update can download from the official site below:
http://openvpn.net/index.php/download/community-downloads.html
The above info is also quoted from OpenVPN’s official site.
If you’re interested in learning more, search for “CVE-2014-0160” and you’ll find plenty of related material.
So when did the Tomato by shibby build fix this issue?
Let’s look at its Changelog:
http://tomato.groov.pl/?page_id=78
Search for the keyword “openssl” and you’ll find it only switched to 1.0.1g after version 117… so if you’re on a build before 117, please update as soon as possible, and also update your keys and passwords.
For the relevant handling and further understanding, refer to this page:
http://devco.re/blog/2014/04/11/openssl-heartbleed-how-to-hack-how-to-protect/
OK, now let’s get to the main task.
Step 1: Confirm your current version and build type.
On the left side of the interface there’s an ABOUT; click it and it’ll display as shown below.

As you can see, my version is “Tomato Firmware 1.28.0000 MIPSR2-116 K26 USB AIO”; in a moment we’ll find its upgraded build to download.
Step 2: Back up your configuration.
Note: backing up the config can speed up later restoration, but because of version differences, directly importing a config file may cause features to stop working. Please test it yourself; if it doesn’t work, reset to factory defaults.
Click Administration on the left interface; inside there’s a Configuration option.

There’s a Backup Configuration section.
Click Backup, and this backup file will be downloaded to your computer.

It’s also recommended to back up your OpenVPN data, such as CERT and KEY, just in case something goes wrong…
Step 3: Download your firmware.
Go to the Tomato by shibby official site to download:
http://tomato.groov.pl/?page_id=164
In my case, since I have an ASUS RT-N16, I clicked into the K26 category,
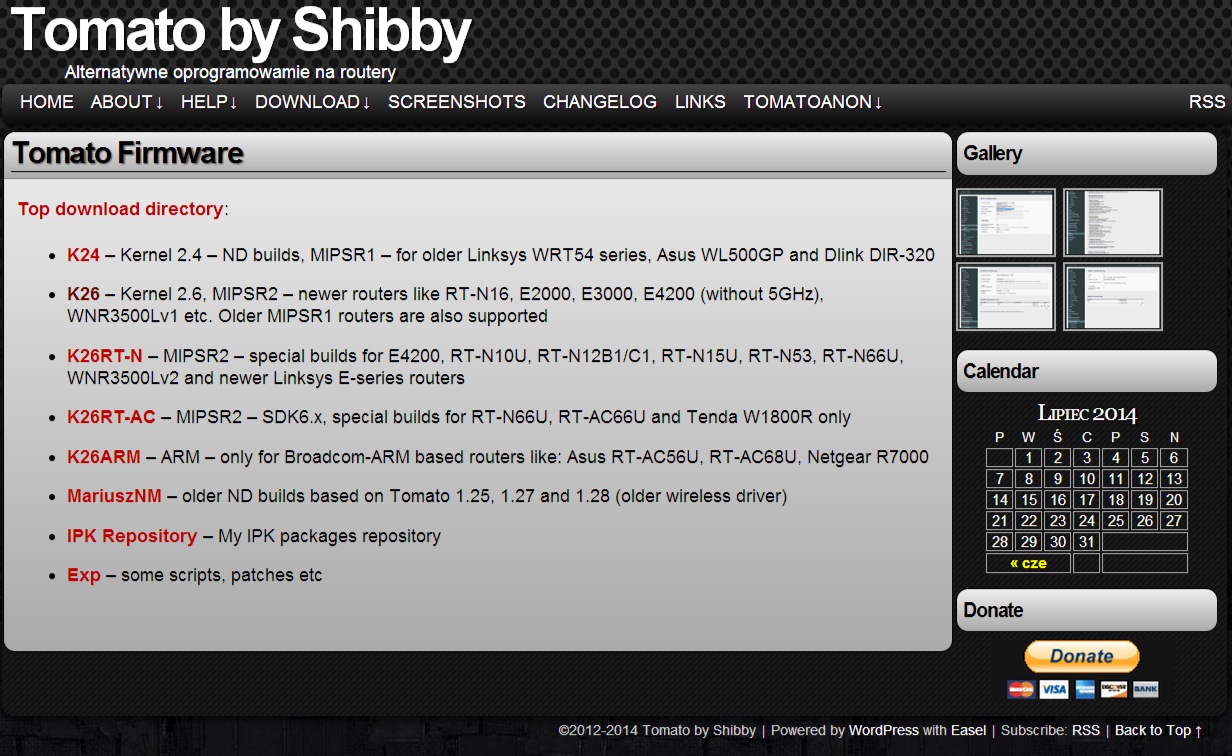
Found the latest version 120, then found the build I wanted, tomato-K26USB-1.28.RT-MIPSR1-120-AIOY


Step 4: Update the firmware.
Under Administration there’s an Upgrade option.

If you previously enabled JFFS, remember to turn that feature off first here.

On the JFFS tab, uncheck ENABLE, then click SAVE.

Go back into Upgrade and you can now update. Click “Choose File,” locate the update file you just downloaded, and for “After flashing, erase all data in NVRAM memory,” this option is optional—I personally always check it to avoid compatibility issues later. Finally, click “Upgrade.”

The update begins—just wait~

The update is complete; click Continue.

After Continue, all settings basically revert to factory defaults. Please set your NIC to 192.168.1.10/24, the GATEWAY to 192.168.1.1, then open a browser to configure. The connection address is http://192.168.1.1, with both username and password being admin.

Restore the configuration file you backed up earlier.

Update complete.

Step 5: Change the CERT and KEY.
For the re-creation process, refer to the page below:
http://www.mobile01.com/topicdetail.php?f=110&t=1987934&p=1
The finished CERT and KEY files are shown below; one of them, Client1.ovpn, is used on the client side, which we’ll cover shortly.

Step 6: Change the CLIENT-side settings.
For the WINDOWS part, you can still refer to:
http://www.mobile01.com/topicdetail.php?f=110&t=1987934&p=1
Here I’ll add the ANDROID part~
- Go to Google Play and download OpenVPN Connect.
Reference:
https://play.google.com/store/apps/details?id=net.openvpn.openvpn
- Edit the Client1.ovpn file.
Personally I’d recommend using TUN mode even as an individual—it’s more secure, and basically any firewall can be bypassed,
unlike TAP, which some firewalls can’t get past. Also, using TLS encryption is more secure;
with something like this Heartbleed case, using TLS has fewer leakage concerns.

If you don’t have this file, you can use “Notepad” to type in the text I’ve copied below, save it as a new file, and change the filename to XXX(anything).ovpn.
==========File contents below=============
client
# Use a TUN device (routing mode)
dev tun
# The VPN server’s IP address or domain name
remote xxx.xxx.xxx.xxx
#Change the xxx.xxx.xxx.xxx above to your public static IP, or use a dynamic DNS service like NO-IP
port 1194
#You can change the PORT yourself
proto udp
resolv-retry infinite
nobind
persist-key
persist-tun
ca ca.crt
# PKCS12
cert client1.pem
key client1.key
comp-lzo
verb 3
# If using TAP mode, remove redirect-gateway
redirect-gateway
==========File contents above=============
Lines starting with # are commented out—that is, ignored—so you can add your own little notes there. Please also fill in your own relevant info, such as the IP address or TUN/TAP setting.
3. Put the files onto your Android phone.
First place the ca.crt, client1.crt, client1.key, Client1.ovpn, and client1.pem you just generated into the same folder, then transfer them to the phone via Dropbox or directly. Remember where you store them.
(For SAMSUNG, the internal storage is at /storage/sdcard0; an external SD card is at /storage/extSdCard.)
4. Open OpenVPN Connect.

Press the menu key to bring up the options.

Tap Import.

Select Import Profile from SD card.

Once imported, you can tap Connect to connect.

Choose to trust this program and press Confirm.

Connection successful!! (Remember to test on an external network or over 3G.)

Final step: Check whether the OpenSSL Heartbleed issue still exists.
You can use the tool at the URL below to check:
http://www.ithome.com.tw/news/86882
Alright, all done!!
If you have any questions, feel free to discuss with me!